
Get your leads in.
The right way.
One CSV template, three levels of detail. Fill in what you have, skip what you don't, and your leads land in the CRM mapped correctly the first time.
Step zero: grab the template. It has every column already named to match your CRM.
Download the CSV templateStep 1
Pick your upload level.
All three use the same template. The level only decides how many columns you fill in — leave the rest empty.
Step 2
Fill in your columns.
Where you see exact values, the spelling and capitalization must match letter for letter — tap a value to copy it.
First, open your template
Find the file you downloaded
Look in your Downloads folder for a file called OfferTermz-Upload-Template.csv. That's the CSV from the button at the top of this page.
If it came down with a long random name instead, that's still the right file — the name doesn't affect anything.
Open it
Double-click it and it opens in Excel or Numbers. Prefer Google Sheets? Go to sheets.google.com, open a blank sheet, then File → Import → Upload and pick the file.
Row 1 is the column names. Don't change, delete, or reorder it — it's how the CRM knows what each column is.
Add your leads, one per row
Already have your leads in another spreadsheet or list? Don't retype anything — copy whole columns from your old file and paste them into the matching columns here. A 5,000-lead list moves over in minutes. Just typing in a handful of leads? Start on row 2, one lead per row.
Either way: fill in only the columns for the level you picked below, and leave every other column completely empty.
If Excel turns your phone numbers into something strange, highlight the Phone column, right-click, choose Format Cells, and set it to Text. Then retype the numbers.
Save it as a CSV
Excel: File → Save, and if it asks about keeping the format, choose keep CSV. Google Sheets: File → Download → Comma Separated Values (.csv). Numbers: File → Export To → CSV.
Now, here's what goes in each column
Bare Minimum
3 columns. Required in every upload, no matter which level you picked.
Good Upload
Everything in Bare Minimum, plus these 10 columns.
Pro Upload
Everything in Good Upload, plus these 12 columns. The full deal picture.
Step 3
Upload it to your CRM.
Same steps for every level. About two minutes.
Open Contacts and start an import
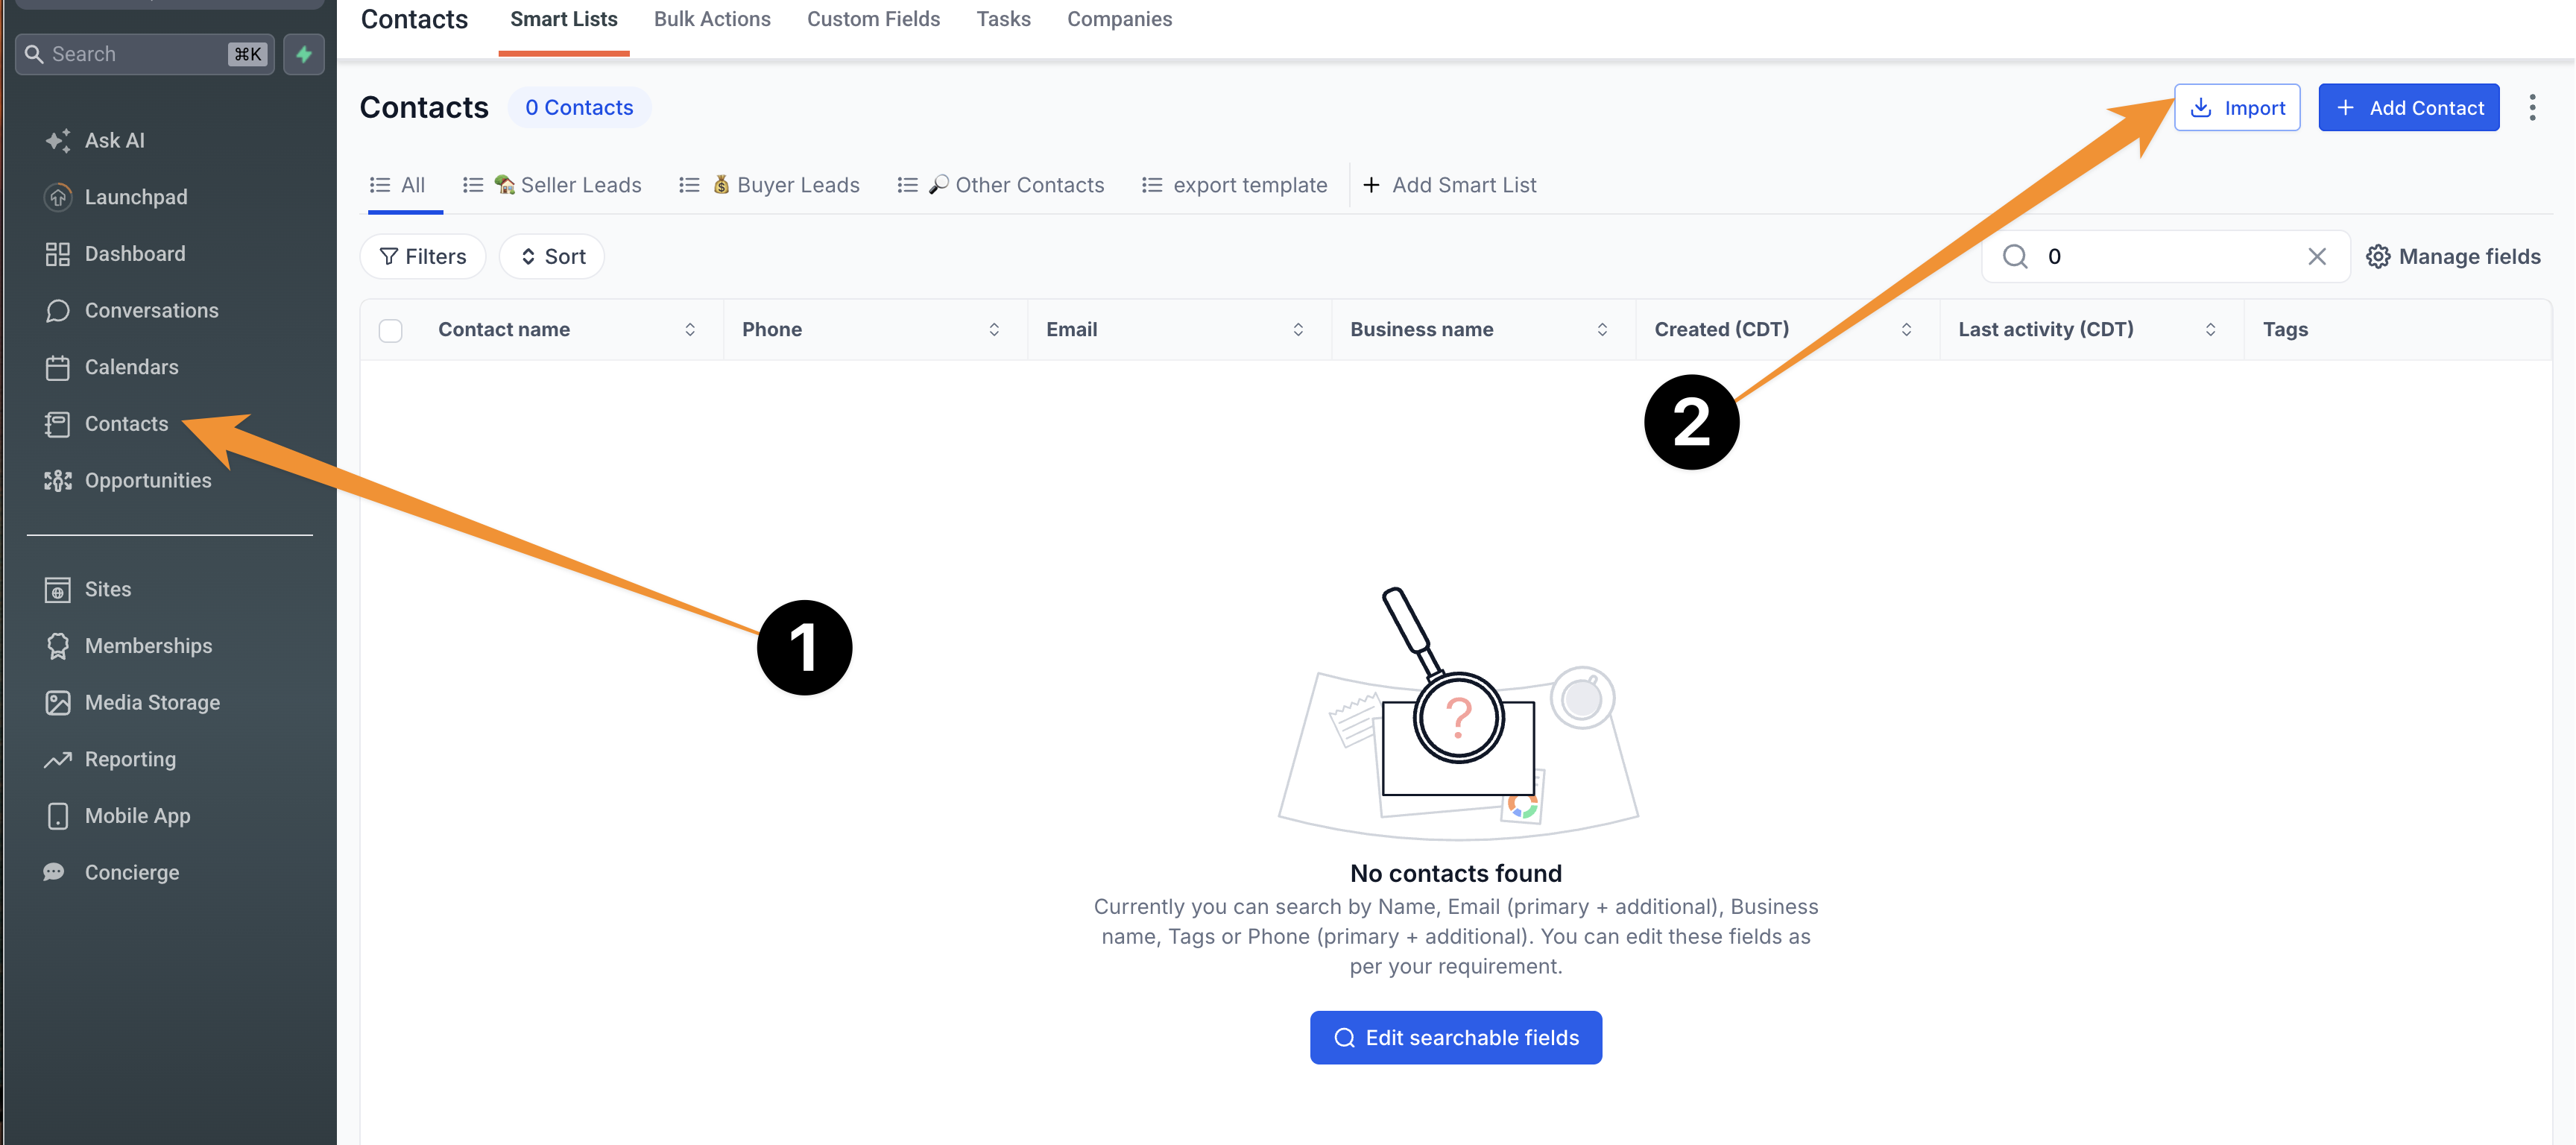
In your CRM's left menu, click Contacts (circle 1 in the picture). Then click the Import button at the top right of your contact list (circle 2).
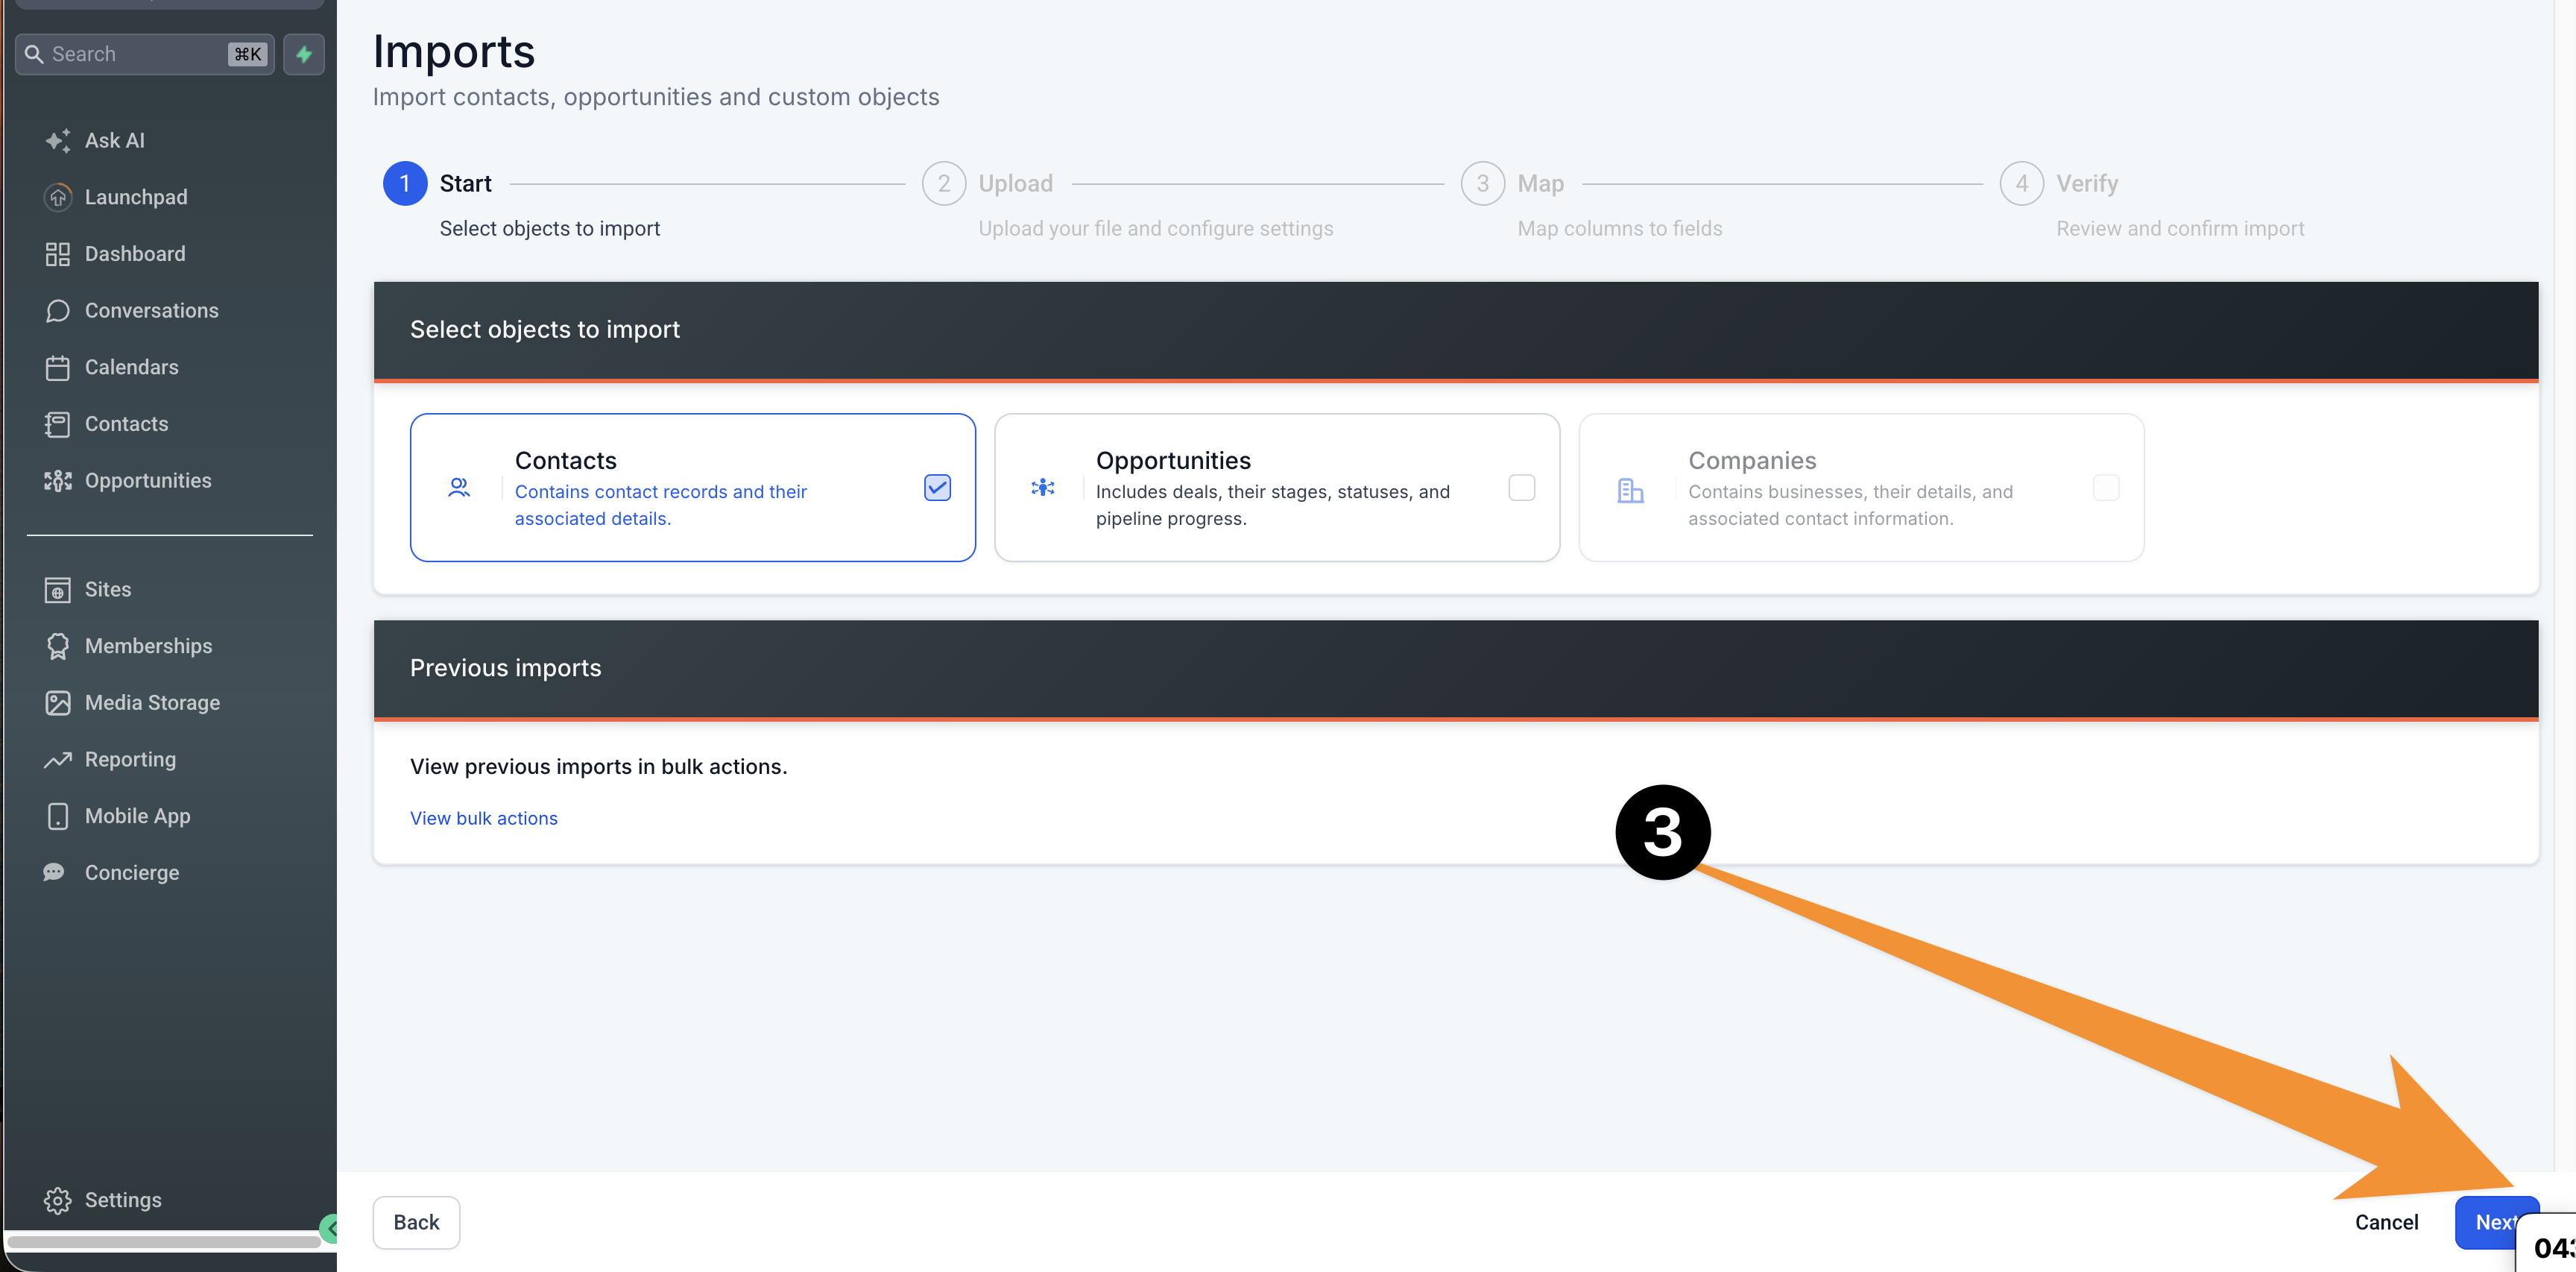
Choose Contacts as what you're importing
On the Imports screen, make sure the Contacts card has a checkmark — it usually already does. Then click Next at the bottom right (circle 3).
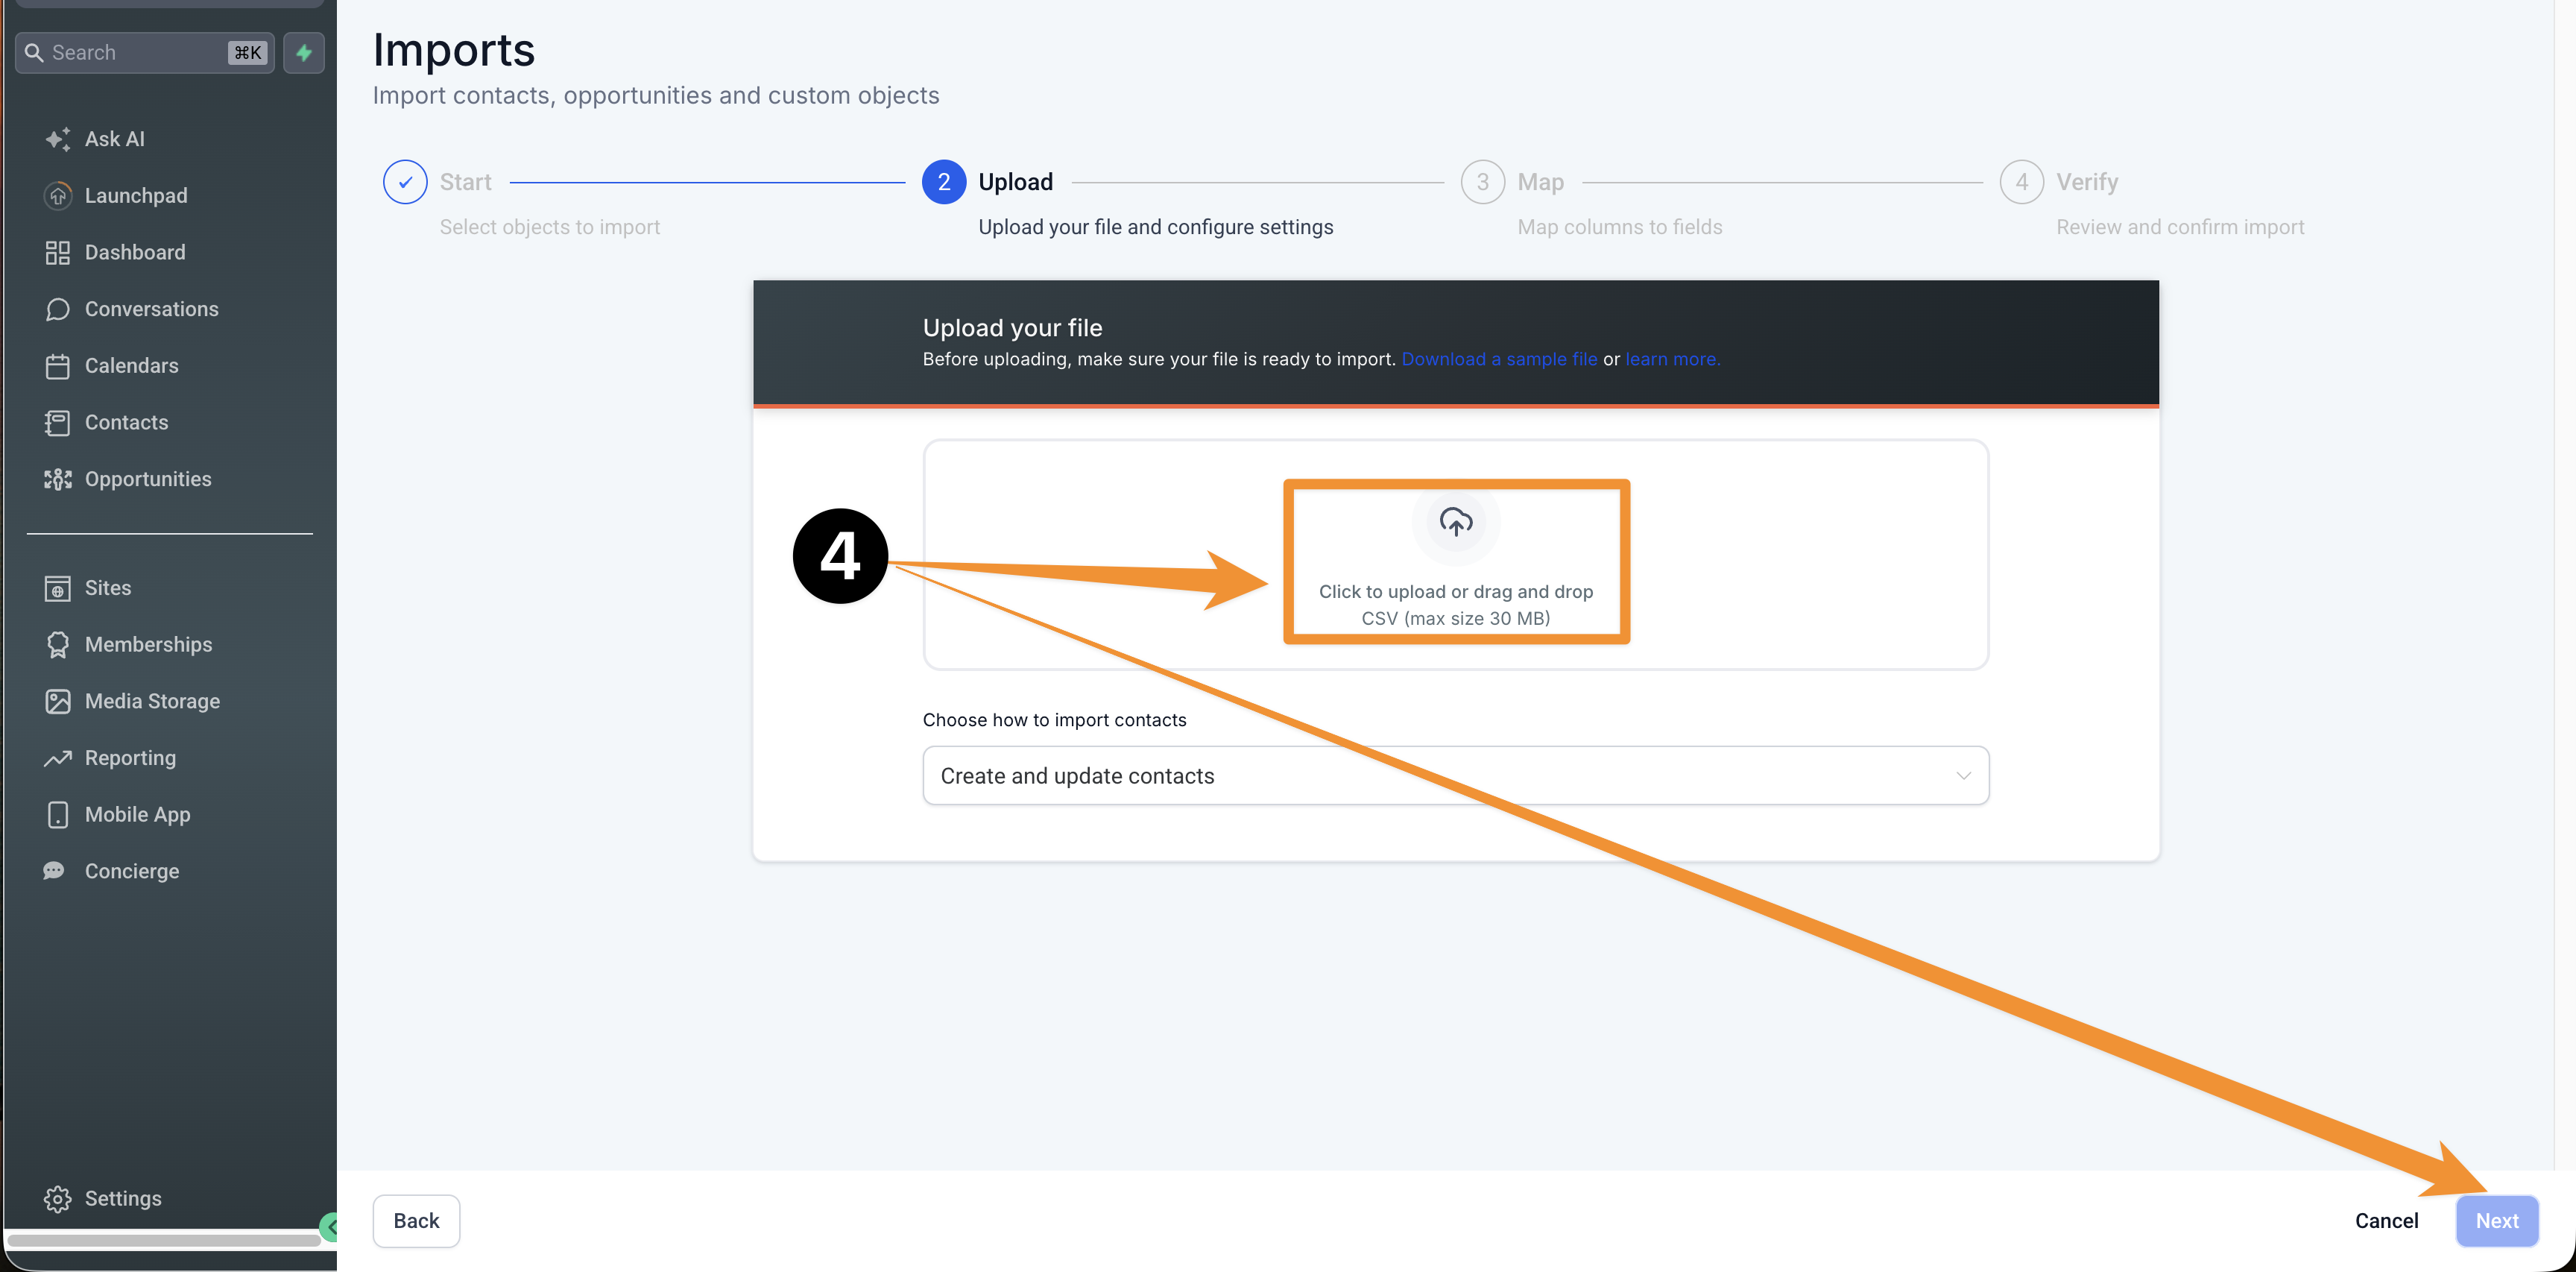
Upload your CSV
Drag in the template you filled out, or click to browse for it. Once it shows as uploaded, click Next (circle 4).
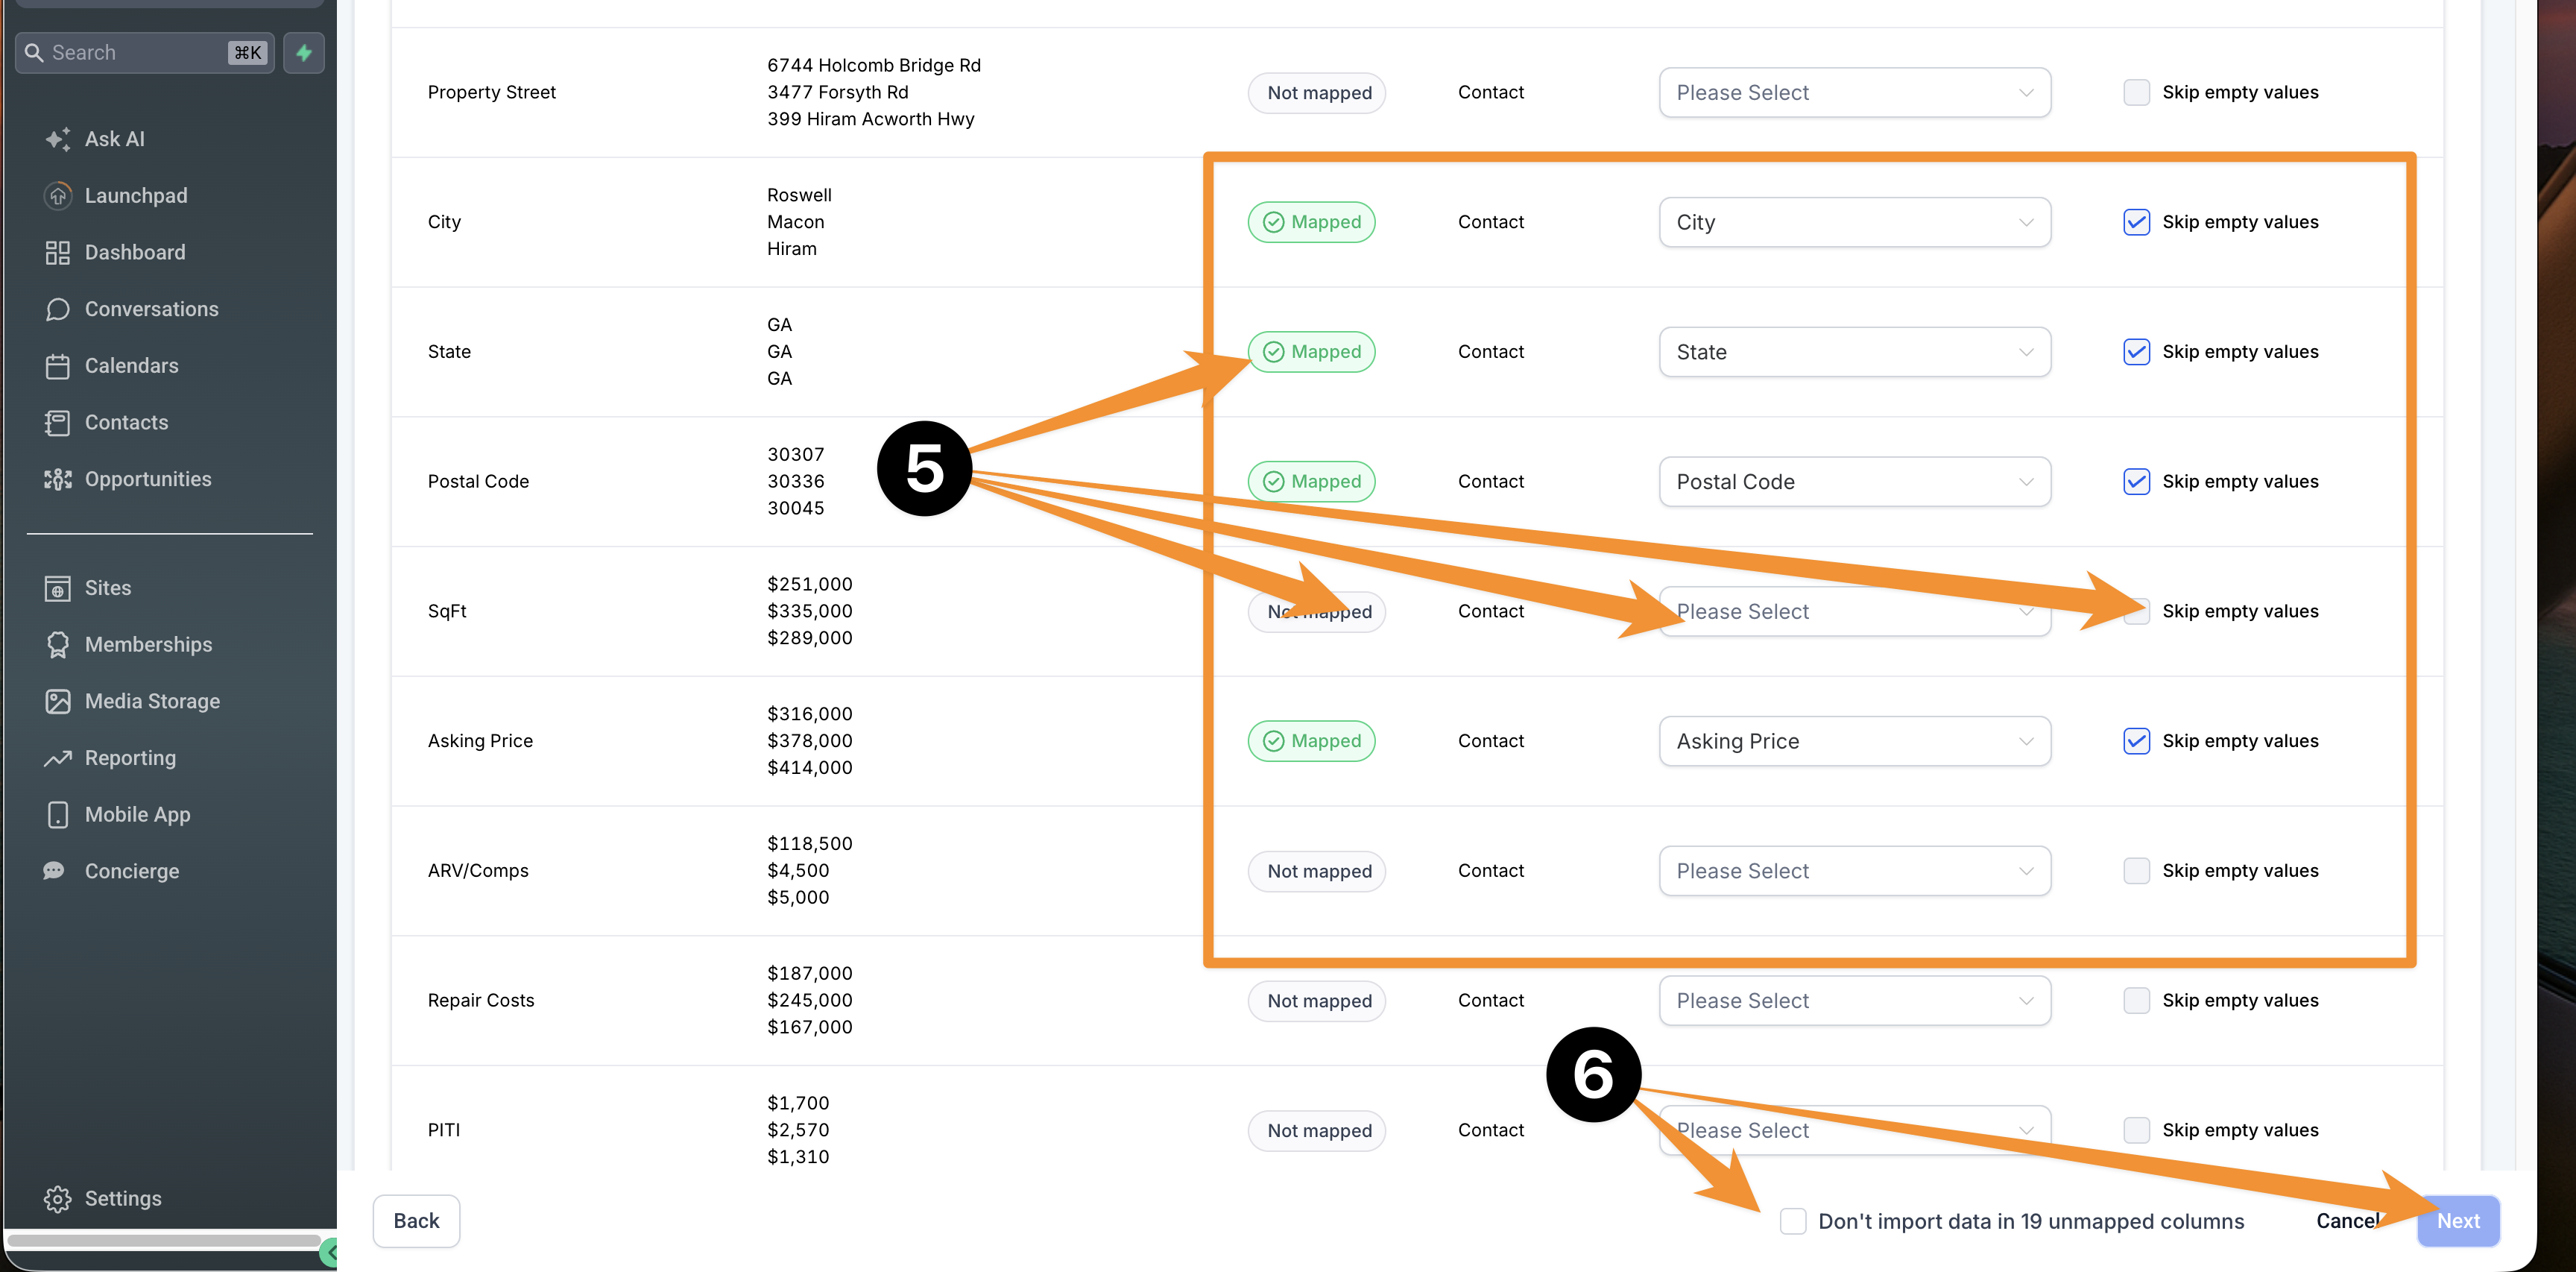
Check the mapping
Every column you filled in should show a green Mapped badge (circle 5). If one you filled says Not mapped, open its Please Select dropdown and pick the matching field. Tick Skip empty values on your mapped columns so blank cells never overwrite existing info.
At the bottom, tick Don't import data in unmapped columns — those are just the template columns you left empty — then click Next (circle 6).
Tag it, confirm, and start the import
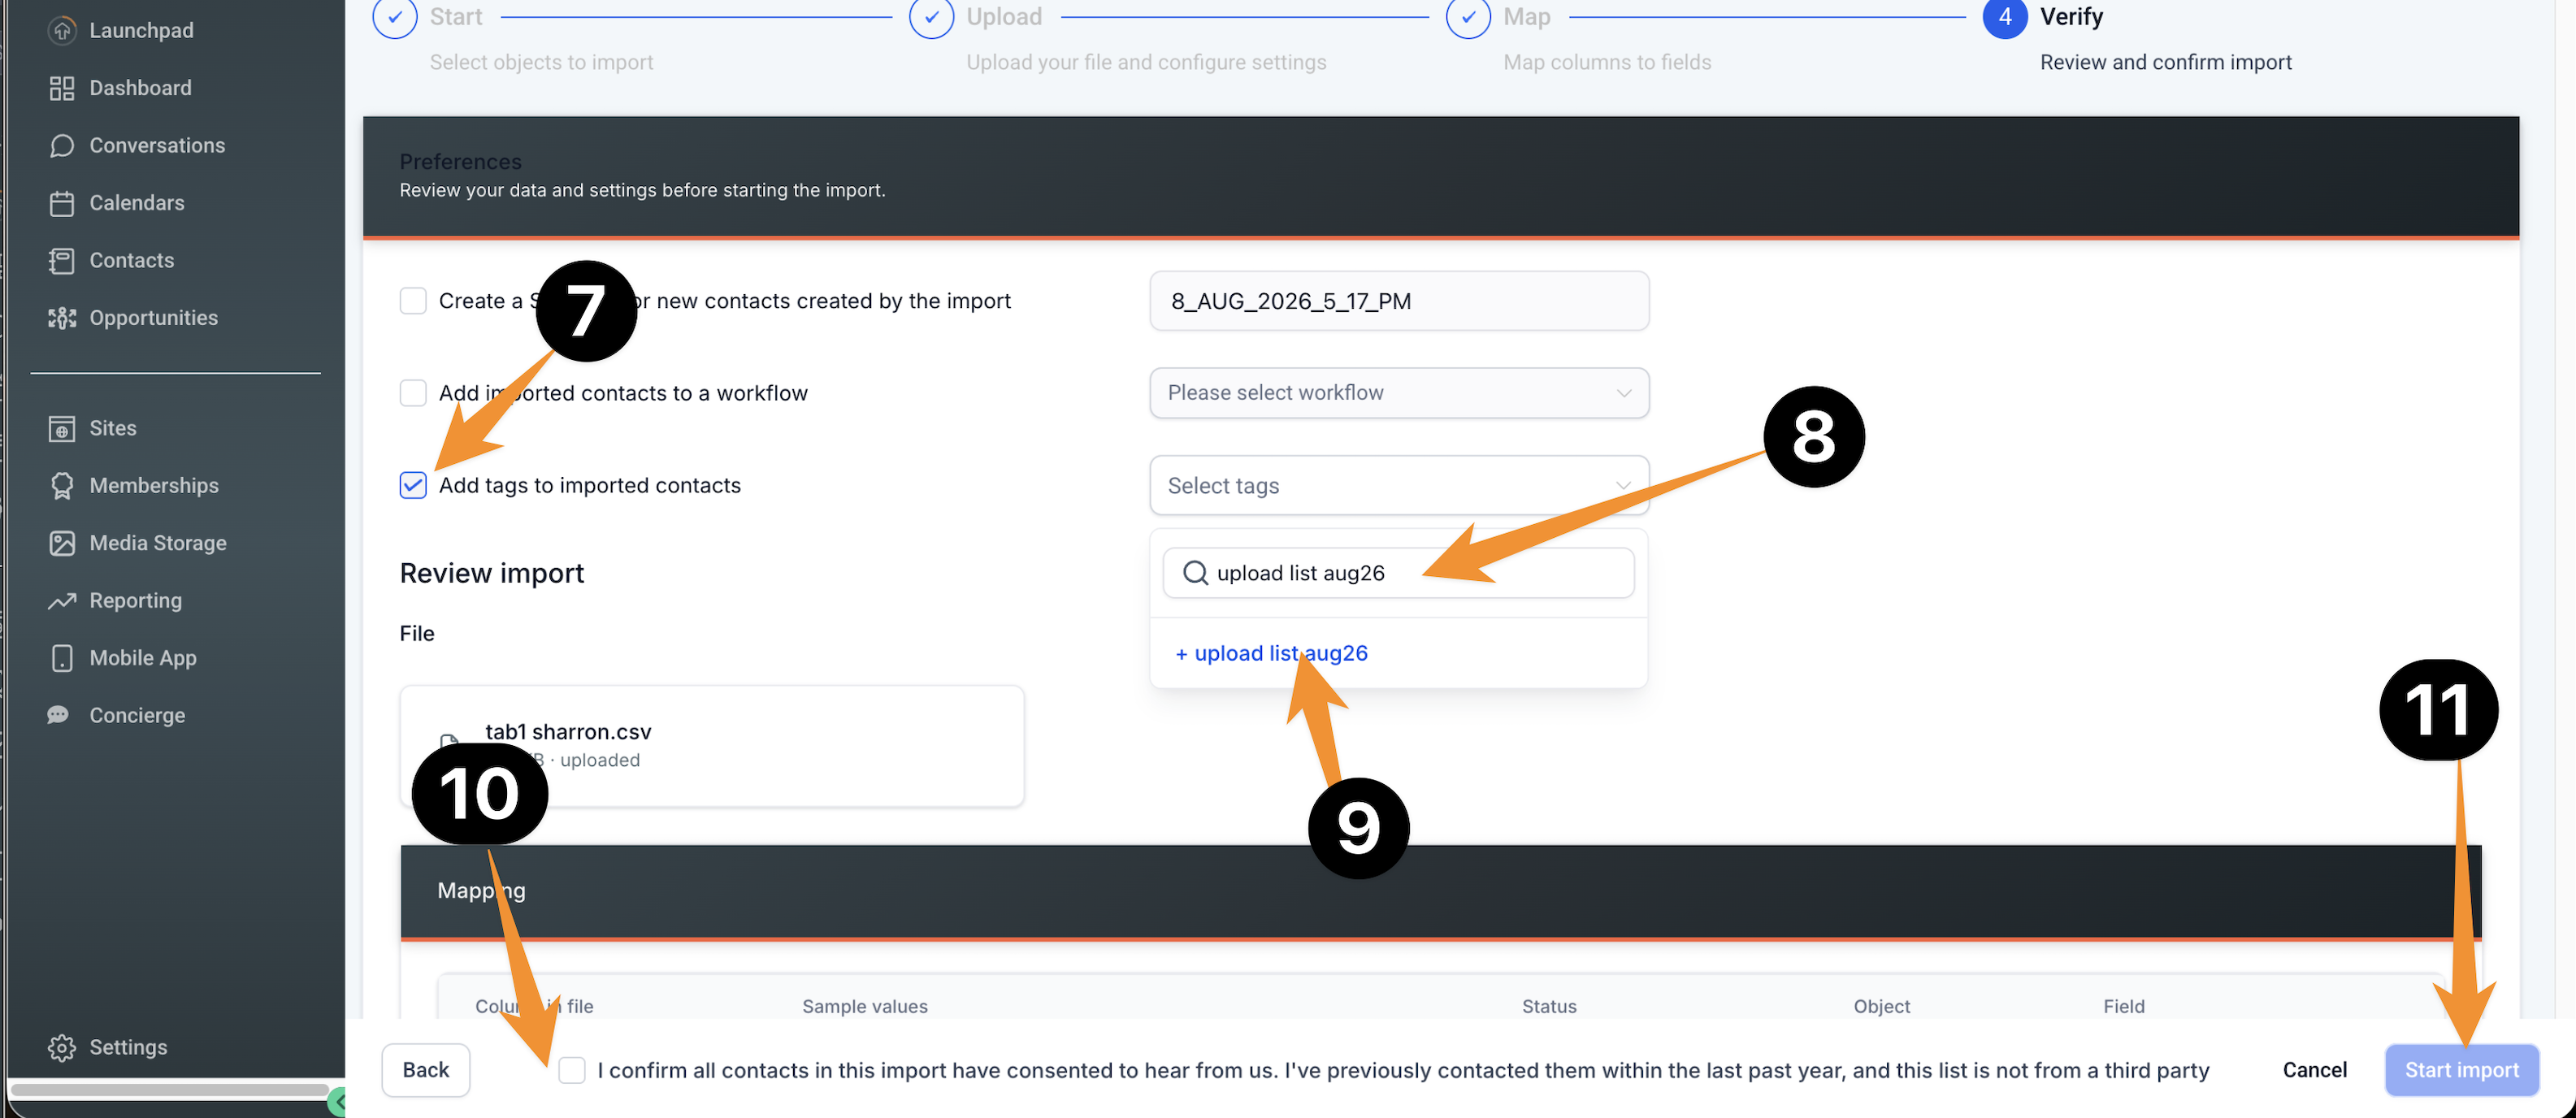
Tick Add tags to imported contacts (circle 7), type a name for this batch — something like upload-list-aug26 — in the tag box (circle 8), and click the + line that appears to create it (circle 9). This one tag lets you find, filter, or undo the entire batch later.
Tick the consent confirmation at the bottom (circle 10), then click Start import (circle 11).
Only check the consent box if it's true for this list. These leads will be getting text messages — consent isn't a formality, it's what keeps your phone number from getting shut down.
Make sure it worked
Give it a minute, then open Contacts → Bulk Actions to see your import listed as finished. Open one or two of the new contacts and confirm the fields look right. That's it — Sam takes it from here.
Stuck on a step?
We'll walk you through it.
Short videos and guides for everything in your CRM.
Open the Help Center